Last night I was looking at a tutorial on
creativebug.com that was taught by
Christine Schmidt on making airmail stamps. I bought Christine's book Print Workshop when it came out a couple of years ago. I also own a lot of her great rubber stamps. Here are my handmade rubber-stamps inspired by the tutorial on
Creativebug.
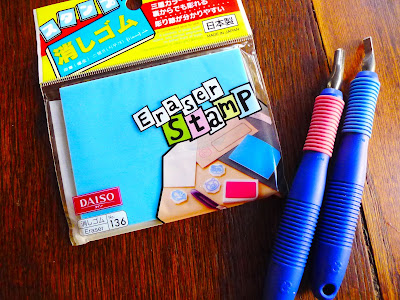 |
I bought a eraser stamp at Daiso for $1.50. You can buy other carving blocks
but I wanted to try using inexpensive materials for this project and it worked just fine.
The cutting tools are Speedball linoleum cutters. |
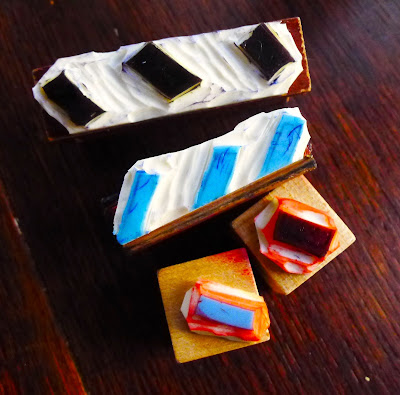 |
| These are the two sets of stamps I carved mounted with rubber cement on blocks of wood. |
This is where I did my version of the airmail stamps. I decided I wanted to have two colors so I carved my first stamp with three marks on it leaving enough SPACE in between for the single stamp. The second stamp was a single mark. This is an easy way to get two colors on the envelope.
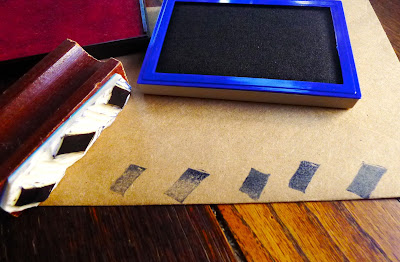 |
| I used the "three mark" stamp with the blue ink pad trying to get close to the edge of the envelope. |
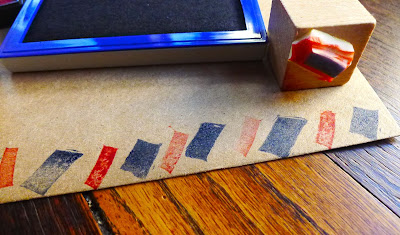 |
The next step is to use the single airmail "mark" stamp with a red ink pad and stamp
in between the blue "marks".
|
 |
| Here are some of the finished stamped envelopes with my new stamps. |
I used craft paper envelopes and used an airmail stamp I found at
raft.net. I didn't trust myself to cut out letters! I am not accurate enough or skilled enough for the linoleum cutters. As you can see I made two sets of stamps. The first one the airmail "marks" are wider and the second one I made was skinnier. I plan to make a third more accurate set but as usual when I see an idea and I want to make it FAST and now. My version is pretty funky but definitely one of a kind envelopes for mail art!
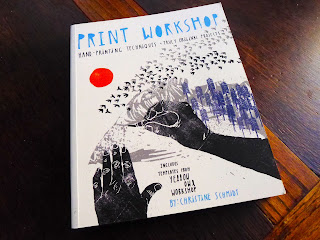 |
Here is the great book by Christine Schmidt called Print Workshop showing
all sorts of hand printing techniques including making rubber stamps. |


The envelope ensures the message and has space on it in which you can compose the name and address of the beneficiary.
ReplyDeleteFacturas adaptadas a Tus necesidades -sobreprint
Looks wonderful! They have nothing common with simple boring envelopes and make the whole look modern and catchy. I will remember your trick and maybe use it some day. I will search for some more reviews on Rush my essay to find more ways to diversify mailing routine.
ReplyDelete